DIY Kitchen Makeover: An Architect’s Transformation – Before and After
modern apartment kitchen
My first suggestion for a modern apartment kitchen is to start with a neutral color palette. Choose a light, airy color for the walls, such as white, cream, or light gray. Then, choose a few accent colors to add pops of color throughout the space. Consider using a bright blue, green, or yellow for the cabinets, countertops, and backsplash. Finally, add some texture with wood accents, such as a butcher block countertop or a wooden cutting board. This will help to create a modern, yet cozy atmosphere.
A Creative Architect’s DIY Kitchen Transformation – Before and After
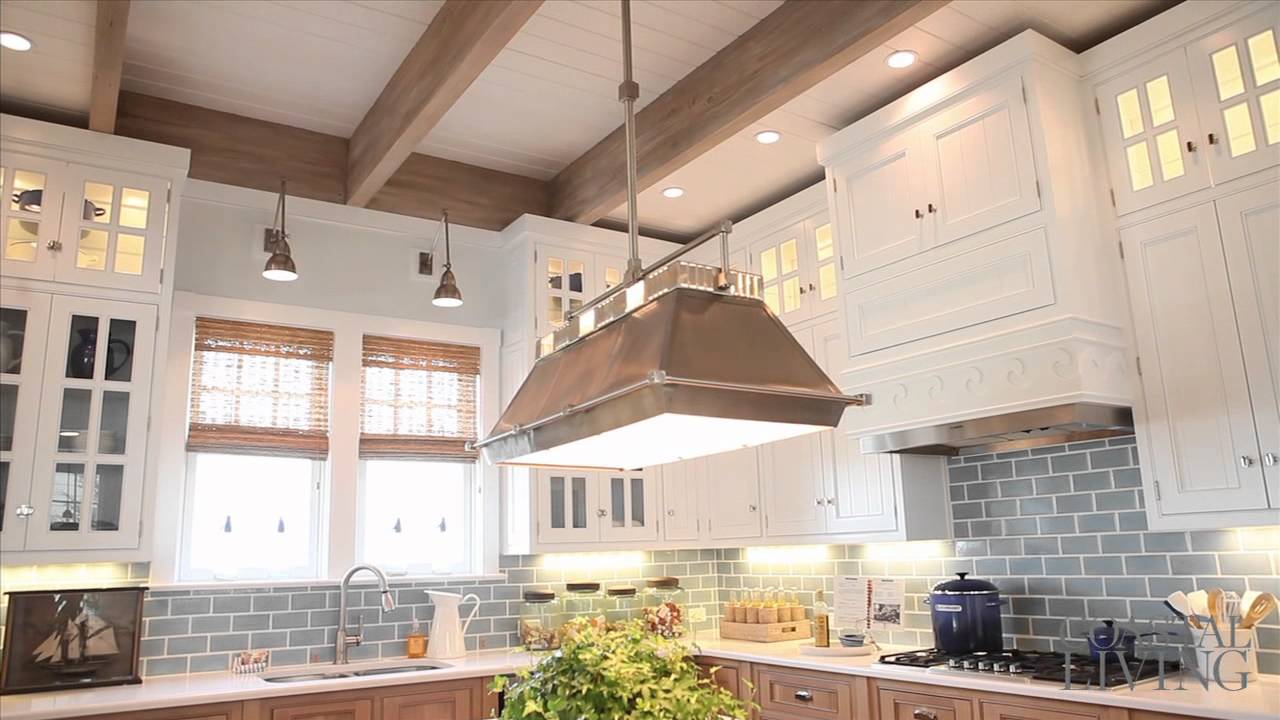
Modern apartment kitchens are designed to be both stylish and functional. They often feature sleek, contemporary designs with stainless steel appliances, granite countertops, and plenty of storage space. Many modern kitchens also include features such as built-in microwaves, dishwashers, and refrigerators. Additionally, modern apartment kitchens often have open floor plans that allow for easy entertaining and cooking. They also often feature modern lighting fixtures, such as recessed lighting and pendant lights, to create a warm and inviting atmosphere. With the right design, modern apartment kitchens can be both stylish and functional.
An Architect’s DIY Kitchen Makeover – Before and After
The Before
When architect and designer, Sarah, decided to take on a kitchen makeover project in her own home, she knew she had her work cut out for her. The kitchen was outdated and in need of a major overhaul. The cabinets were old and worn, the countertops were scratched and stained, and the appliances were outdated. Sarah knew she had to start from scratch and create a kitchen that was both functional and stylish.
The Process
Sarah began by removing all of the old cabinets and countertops. She then replaced them with new, modern cabinets and countertops. She also replaced the outdated appliances with new, energy-efficient models. To complete the look, Sarah added a backsplash, new lighting fixtures, and a few decorative touches.
The After
The end result of Sarah’s DIY kitchen makeover was a stunning transformation. The new cabinets and countertops gave the kitchen a modern, updated look. The new appliances and lighting fixtures added a touch of sophistication. And the decorative touches added a personal touch to the space. Sarah was thrilled with the results and proud of her accomplishment.
Conclusion
Sarah’s DIY kitchen makeover was a success. She was able to transform her outdated kitchen into a modern, stylish space that she could be proud of. With a little bit of hard work and creativity, Sarah was able to create a beautiful kitchen that she could enjoy for years to come.
An Architect’s DIY Kitchen Makeover – Before and After 2025
It’s always been important to be true to the diy aspect of this project i don’t have a lot of high-end tools or even a formal workshop and so these constraints you know the limitations of tool and budget really shaped my design decisions for this kitchen refresh i do think
There’s a difference between a diy approach that simply shops for components and collages them together and one that thoughtfully considers and reinvents or rethinks an off shelf component so to me that’s both the challenging aspect and the reward of practicing as an architect you know inventing a designed solution to a
Problem for design inspiration i looked to museum and restaurant spaces i wanted this rich dark material palette with some wood accents clean surfaces and dramatic lighting and all of this was to highlight this minimalist set of curated functional objects very different to the visually cluttered space we were living


With the backdrop to our living space is the cooking wall and we began our work there by removing the open shelving the backsplash and the old range hood for the new backsplash we cut three quarter inch tempered hardboard panels these kind of interior skins or sheet goods they’re actually very affordable and the
Rippled stainless steel you see there that’s the result of a prior failed experiment we left those in place and we added a heavy duty 22 gauge stainless steel panel between the new range and the new hood the new hood was mounted to the smaller middle panel and we fixed
This in place first so that we could be sure we got the alignment perfect the flanking panels were complicated by the existing switches and receptacles and one tip here when you’re adding thickness to a wall with switches or receptacles is to use box extenders these pad out the junction boxes by the
Material depth that you’re adding once those were in place we made a template for each side and dry fit each one before moving on to painting each of the panels is painted black and it has an eggshell finish which is easy to clean yet not so glossy as to show every surface imperfection
The black also helps to achieve that curated look i was after and basically has the effect of highlighting anything you place in front of it giving it that museum-like quality each backsplash panel is attached with exposed screws painted to match the wall and actually i think they’re barely
Visible but they also allow for easy future removal and if you look closely you’ll also see that we’ve kept a small reveal between each panel which accommodates the less than perfect wall surfaces of the alcove to finish off the backsplash i wanted to maintain a small shelf there for at the
Ready items to use during cooking i picked up two metal shelves from cb2 and face mounted them at 18 inches above the counter surface and i added some repurposed extra butcher block counter material to line the belly of each shelf and we use those as small serving boards
They also kind of catch and reflect the light from above which helps to highlight the objects that we keep there one of them i cut a notch into to use as an ipad stand which we use when we’re cooking and i’ve been experimenting with using other woods and adding some custom
Recesses as well so ongoing experiment to achieve our minimalist design ideas everything we previously stored on the countertop and visible on our open shelving needed a dedicated place in the new layout cooking staples were moved to the pantry where they belong and i replaced our two old bulky knife blocks
With a wall mounted paper stone magnetic rail by epicurean and we chose to align this with the top of our new small shelf All our glassware utensils and dishes were relocated to the drawers below the countertop all within easy reach and close to the dishwasher no more lifting heavy plates overhead or actually cleaning dishes before having to use them for the oversized dishes and platters we purchased a simple industrial media console from cb2 and we
Located that adjacent to the island effectively doubling our storage space and also increasing our serving counter space for when we entertain refacing our yellowed and cracked ikea cabinet doors and drawer fronts was a must and we knew we wanted to maintain the white color palette on all the
Cabinetry so we settled on the super matte white slabs from semi handmade as a good balance between price aesthetics and quality the fronts are a thermofoil finish on a three-quarter inch mdf core and everything arrives conveniently pre-drilled for all our ikea hardware except of course for the poles for those
We chose a simple edge pull and matte aluminum in two sizes eight inches for the wide drawers and four inches for everywhere else it’s just a cleaner more modern look than the bar poles we were replacing now one tip here make sure you order these as soon as possible our lead
Time was in excess of two months and our order actually arrived twice with incorrect parts once we had all the right pieces swapping them out took less than two hours very simple job possibly the fastest upgrade of the project to organize the interior of the drawers i used blum’s ambia line of rubberized
Trays and for smaller items i picked up a few inexpensive interlocking tool storage bins i added a few interior organizers to the cabinets as well a baking sheet rack and a new pull out tray beneath the sink to finish off the cabinetry i added a toe kick
Using velcro and i know you’re probably laughing now but this is actually a trick we use in many high-end projects for things that want to be concealed like built-in vent covers but still need access my wife isn’t convinced she likes the toe kick i personally like that it’s easier
To maintain the velcro gives us flexibility to change it if we want up next was the island backsplash and i reconsidered my idea for the drawers in the raised divider wall in favor of a few modular metal trays the idea was that the backsplash could
Act as a rail and support for the trays and that they could be moved to any location along the wall to do this i left the backsplash top short by half an inch and cut a relief on the back side to accommodate the thickness of the tray lip
And that would just allow it to slide freely now i knew the trays would take a little bit of time to fabricate so i wanted to be sure i ordered those first lacking a local resource i searched etsy and i was able to find a shop willing to
Custom fabricate and powder coat them for me then i set to work removing the existing backsplash and relocating the two island receptacles so they wouldn’t interfere with the trays from there i prepped the rough framing and painted the recessed area to match the backsplash So we’ve got a dry fit but i think i want to add a little kerf cut here to act as a reveal between this side panel and this panel so it’ll be a little shadow line to attach the panel to the wall i used rare earth magnets just in case i needed
Access to the wiring or if i changed my mind about the storage drawers in the future the continuous reveal track allows the trays to be relocated as needed for cooking cleanup or removed all together and i think this treatment is just more in keeping with the new design and the tiny drawers
As we discussed in part one our original plan was to refinish all our ikea butcher block counters and that worked really well for the ones flanking the range these solid beach tops are once again pristine and smooth as silk and we’ve chosen to keep them as is and unfinished as with any renovation
Project as you get into it sometimes you discover things that inform a new set of decisions this countertop is bowed you can see at the end there it’s about a quarter of an inch up in the center and that’s because the dishwasher is dumping a lot of hot moist air beneath this
Countertop it’s escaping the wood is moving and over time it’s developing some some stress cracks in the center here we have significant water damage here and as i look at the edge of this sink area it’s held up okay but it’s it starts to smell um and so
I’ve just noticed as i’ve been taking things apart that that’s kind of a funk that i don’t think we’re going to get rid of equally this area we were going to recess here it actually extends further beyond this edge than i would like so i think given all of that information we’re
Going to be looking at replacing this countertop so this is the underside of the countertop here you can see this is where the under mount sink was it’s been there about 14 years and you can see definitely a lot of damage there so not that not the best marriage of uh services
Actually glad um we ended up replacing this from amongst seemingly thousands of stone countertop samples my wife and i finally settled on a honed soapstone for the island and admittedly not so diy choice so we called in a local stone fabricator to help this is kind of the
One place where we deviated from the diy directive soapstone is still quarried here in the us and we chose it for its tone and the soft informal feel the thing that gives it that soft feel is a high towel content which means it’s more susceptible to scratching and those scratches can actually be
Buffed out if you’d like or as we plan to do simply lived with as they contribute to the natural patina as the stone ages soapstone’s both bacteria and heat resistant and because it’s really dense you don’t actually have to do anything to seal it some people choose
To apply mineral oil to darken and even the tone but it’s definitely not necessary now one thing to note here because darker surfaces tend to show spills water spots and crumbs you want to choose a honed finish to really minimize that effect i don’t want you thinking the butcher
Block went to waste we actually recycled it into many many cutting boards which we gifted to family and friends over the holidays and the remnants also fill those serving inserts for the floating shelves on the cooking wall lighting is incredibly important to setting the mood into space and it was
Time to upgrade our old fixtures we started by replacing the two halogen lights above the cooking area with two warm white led gimbals by juno and since everything is on dimmers already the gimbal just adds another dimension and more flexibility so for the island i was looking for a fixture that would be
Sleek stripped down led and would work with our existing power feed and we found one made by oxygen installed it and the moment we turned it on we knew we’d have to swap it out kind of a kind of a gross yuck this is this is not pleasant
The diffuser created this wrap around effect that was unnatural when we were using the island so you know no shadows no depth perception you wouldn’t think that would matter but everyone in the house just had a really bad reaction to this fixture so i noticed that the lighting at the
New range hood that we bought was really appealing and i said you know what’s the difference between these two and i think in part it was appealing because there was three of them and together they each cast these shadows which it just feels innate and natural so i started looking for a
Light which had individually lensed led chips and interestingly we landed back at the exact same manufacturer as the original light we splurged on for our house this is the linear laser blade pendant and it can be configured with different chip groupings and each chip has a focusing optic which delivers this
Focused beam of light rather than a diffuse pool of it and the optics can be configured in three ways as a spot a flood or a wide flood and i wanted to be sure i got the light levels right so i diagrammed it all out in autocad it
Chose the mounting height for it and we also ended up choosing the wide flood for maximum coverage of the work surface and the sink and the difference in light quality just incredible so much nicer so much better and although reconfiguring the power feed in the ceiling was pretty tricky
It certainly is still within the diy playbook this was probably one of the most impactful upgrades we made in the project for plumbing we reused our original lk zero radius sink that was a pretty big expenditure in the initial project but it was still in fine shape we did
End up replacing the faucet with the talus n this has a pull down spray it’s made by hansgrohe again this isn’t the cheapest fixture you can buy but we found that really spending more on plumbing fixtures makes a lot of sense from a longevity standpoint and in keeping with the decluttering theme we
Also added a top filling deck mounted soap dispenser and i always prefer to match manufacturers of adjacent fittings especially you know things like plumbing fittings when possible this way the finishes and quality all match too upgrading appliances just an easy way to modernize the look of a kitchen our
Refrigerator and dishwasher were in good condition so we chose to keep the stainless steel material pallet and replace our slide in range with a new gas range by kitchenaid and we paired that with a vent hood from ge profile the new range has the look and feel of a
Professional range with matching higher power burners continuous cast iron grates and kind of an industrial styling to exhaust all the cooking odors and gases we wanted a high quality high cfm model that was also quiet who doesn’t right this one’s 1200 cfm and we can safely hold a conversation while we’re cooking
Even when it’s on high importantly it actually exhausts the cooking odors and smoke unlike the other one that it replaced this is due in part to the higher cfm and to the new hard ducting i installed the hood comes with an integrated butterfly damper to keep all the cold
Air out in winter and in new construction code requires us to provide makeup air for a model this large to ensure that the fan doesn’t depressurize the house and pull in air from say our wood stove fluid our makeup air solution is decidedly diy and low tech
Along with these upgrades we of course couldn’t help but treat ourselves to a few accessories along the way to see everything in our kit check the description below for links and the detailed post on 30×40.com living in a space you designed some 14 years prior is just a daily reminder of
Your own experience the things i was preoccupied with when i designed it you know some of them were trivial and i know having done this long enough that those same preoccupations will be revealed in 10 years time and these design decisions i’m making today will all seem equally trivial it’s just
Unavoidable as humbling as that is it’s also immensely instructive i can’t think of a better way to learn about details and budgets form and function than a do-it-yourself remodeling project You
Questions and Answers about a Modern Apartment Kitchen
Q1: What type of appliances are typically found in a modern apartment kitchen?
A1: A modern apartment kitchen typically includes a refrigerator, stove, oven, dishwasher, and microwave.
Q2: What type of countertops are usually found in a modern apartment kitchen?
A2: Granite, quartz, and laminate are the most common countertop materials found in modern apartment kitchens.
Q3: What type of flooring is typically found in a modern apartment kitchen?
A3: Vinyl, tile, and hardwood are the most common flooring materials found in modern apartment kitchens.
Q4: What type of lighting is typically found in a modern apartment kitchen?
A4: Recessed lighting, pendant lighting, and under-cabinet lighting are the most common types of lighting found in modern apartment kitchens.
Q5: What type of storage solutions are typically found in a modern apartment kitchen?
A5: Cabinets, drawers, shelves, and pantries are the most common storage solutions found in modern apartment kitchens.